Show imports
import torch
from torch.utils.data import Dataset
from torchvision import datasets
from torchvision.transforms import ToTensor
import matplotlib.pyplot as pltDataset, DataLoader, PyTorch Dataset, Pytorch Dataloader
According to PyTorch:
“Code for processing data samples can get messy and hard to maintain; we ideally want our dataset code to be decoupled from our model training code for better readability and modularity.”
In short, we try to prevent messy notebooks and data leakage by seperating our data and data processing from our model. This is done with the Dataset and DataLoader classes.
We will see that working with these classes is pretty easy. PyTorch has commonly datasets built-in, ready to work with. Since the fashionMNIST dataset is used for computer vision-related tasks, it is stored in the torchvision module.
The fashionMNIST dataset takes 4 parameters:
root is the folder name where the data will be stored in.
train specifies if you want to download the training or testing data.
download downloads the data from the internet when you don’t have it locally yet.
transform takes a PIL image and transforms it to a tensor.
Let’s import the fashionMNIST dataset.
import torch
from torch.utils.data import Dataset
from torchvision import datasets
from torchvision.transforms import ToTensor
import matplotlib.pyplot as plttraining_data = datasets.FashionMNIST(
root="data",
train=True,
download=True,
transform=ToTensor()
)
test_data = datasets.FashionMNIST(
root="data",
train=False,
download=True,
transform=ToTensor()
)Now that we saved the fashionMNIST dataset in a Dataset object, what can we do with it?
# Dataset summary
training_data

# Class labels
training_data.classes

# Select a row of data
img, label = training_data[0]training_data:
Dataset FashionMNIST
Number of datapoints: 60000
Root location: data
Split: Train
StandardTransform
Transform: ToTensor()
training_data.classes:
[
'T-shirt/top',
'Trouser',
'Pullover',
'Dress',
'Coat',
'Sandal',
'Shirt',
'Sneaker',
'Bag',
'Ankle boot',
]
label:
9It’s always a good idea to inspect your data. Let’s look at img and label from the first row of data.
plt.imshow(img.squeeze(), cmap='gray')
plt.set_title(training_data.classes[label])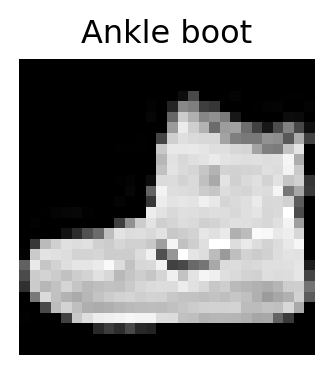
That indeed looks like an ankle boot, very nice!
We don’t always want to use predefined datasets. Very often we have our own data that we want to use. Pytorch has two ways of creating your own dataset. the map-style dataset, which is most commonly used, and the iterable-style dataset, for data that comes in on the fly, such as user-log data. The map-style behaves as you would likely expect from a dataset: you know its length beforehand, and you can select data through an index. For this, map-style datasets need to implement the __len__ and __getitem__ method. Let’s use our own data with a map-style Dataset.
Consider the case where we have a csv file of image file names and the labels associated with them.
| Item Name | Label | |
|---|---|---|
| 0 | tshirt1.jpg | 0 |
| 1 | tshirt2.jpg | 0 |
| 2 | ... | ... |
| 3 | ankleboot999.jpg | 9 |
We would define a custom dataset class as such:
import os
import pandas as pd
from torchvision.io import read_image

class CustomImageDataSet(Dataset):
    def __init__(self, annotations_file, img_dir, transform=None, target_transform=None):
        self.img_labels = pd.read_csv(annotations_file)
        self.img_dir = img_dir
        self.transform = transform # optional
        self.target_transform = target_transform # optional

    def __len__(self):
        return len(self.img_labels)

    def __getitem__(self, idx):
        img_path = os.path.join(self.img_dir, self.img_labels.iloc[idx, 0])

        img = read_image(img_path)
        label = self.img_labels.iloc[idx, 1]

        if self.transform:
            img = self.transform(img)
        if self.target_transform:
            label = self.target_transform(label)
        return img, label
The code above is a bit involved, so let’s walk through it.
__init__ stores values that we pass in variables, and reads the labels file annotations_file.
__len__ specifies the size of the dataset by returning the amount of labels.
__getitem__ creates a path to an image. For example, if img_dir='images' and idx=0, then img_path is images/tshirt1.jpg. It then reads the image using a predefined PyTorch function, and reads the label. If any transformations are specified they are applied.
We can now select images and labels from our dataset, much like we did earlier in @selecting-img-label
In the code above we only specified how to return a single (image, label) pair. In practice, we typically use lots of images and labels (called batches) for per training step. Additionally, we want to shuffle data (to prevent overfitting) and we want to speed up the process using multiprocessing. This is where the DataLoader class steps in. Let’s use the DataLoader to retrieve 64 images at once.
from torch.utils.data import DataLoader

train_dataloader = DataLoader(training_data, batch_size=64, shuffle=True)
test_dataloader = DataLoader(test_data, batch_size=64, shuffle=True)

# Get data for one simulated training step
train_image_features, train_labels = next(iter(train_dataloader))
Remember that these images are the data used for one training step. Let’s see the batch of images that our dataloader just sent us.
figure = plt.figure(figsize=(8, 8))
cols, rows = 8, 8

for i in range(cols * rows):
    idx = i
    img = train_image_features[idx]

    figure.add_subplot(rows, cols, i +1)
    plt.imshow(img.squeeze(), cmap="gray")
    plt.title(training_data.classes[train_labels[idx]], pad=1, fontsize=10)
    plt.axis("off")
plt.show()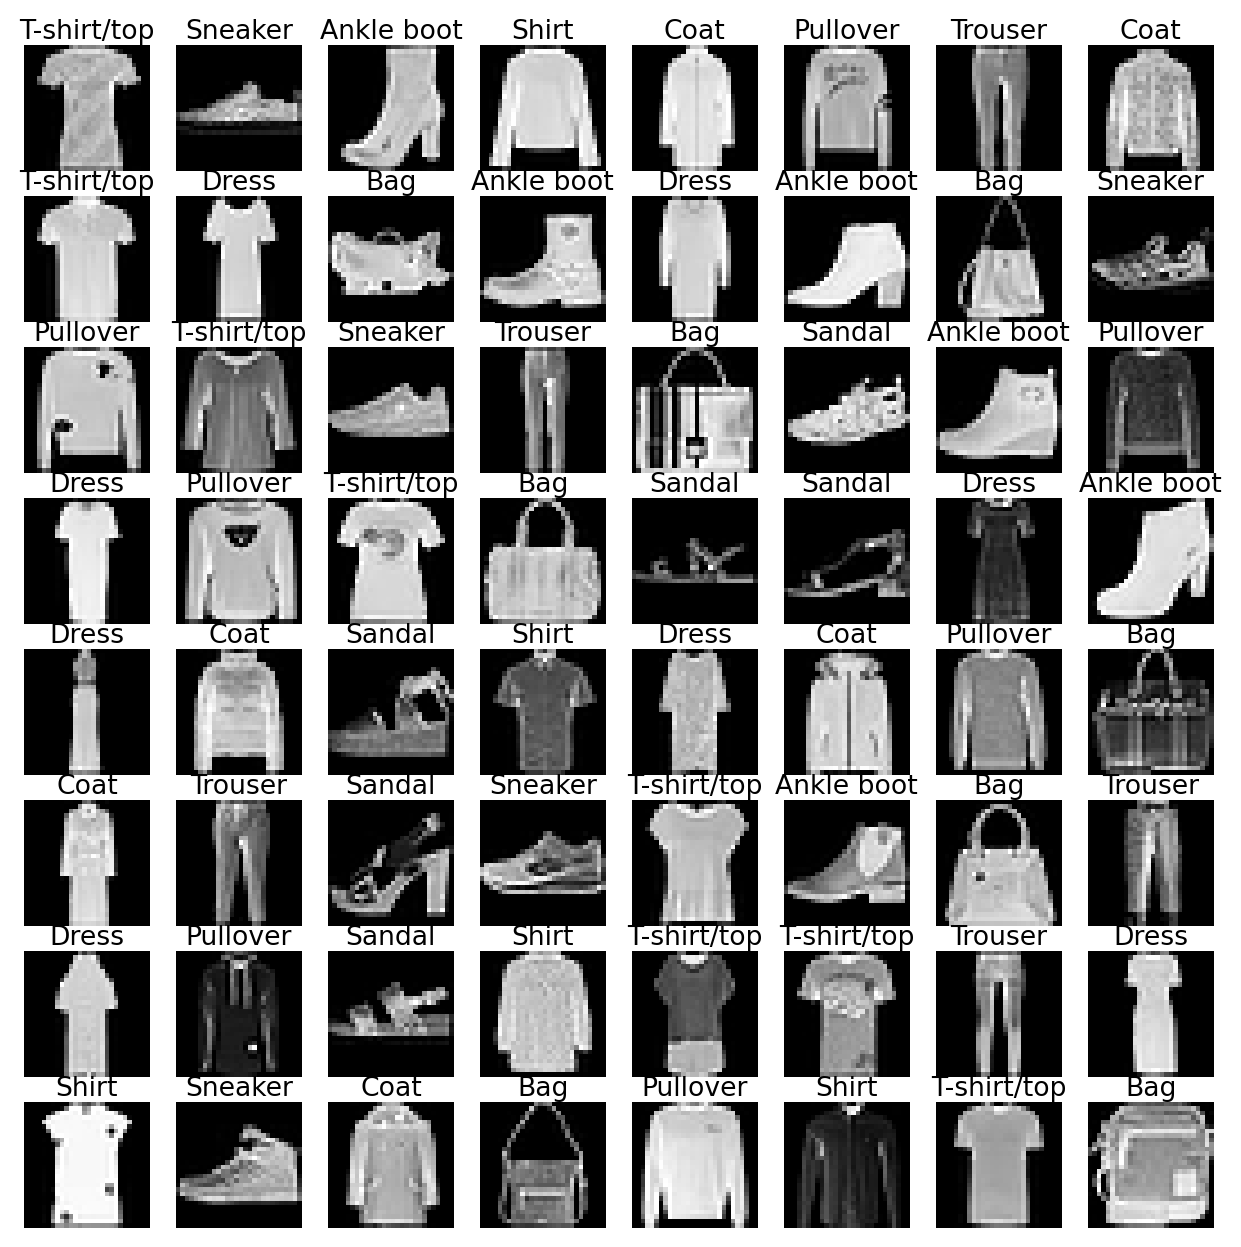
That’s a lot of images! By using DataLoader, we have an easy way to retrieve lots of images from our data at once.
We can also control how data is shuffled (or in other words, the way that the random batch is sampled). We do this by setting the sampler parameter of the DataLoader. When doing this we have to set shuffle=False, since the shuffle parameter essentially sets the sampler parameter for us.
import numpy as np
from torch.utils.data.sampler import SequentialSampler, SubsetRandomSampler

# Returns images in order.
# The first batch will have the first 32 images, the second batch will have image 33-64, etc.
train_loader = DataLoader(training_data, batch_size=32, sampler=SequentialSampler(training_data))

# Sample randomly, only including the images 50-100.
indices = np.arange(50, 101)
train_loader = DataLoader(training_data, batch_size=32, sampler=SubsetRandomSampler(indices))
These DataLoaders will select images in order of appearance in data, and randomly sample a subset of the data. Read about all the ways to sample in the PyTorch documentation.
To summarize: With Dataset and DataLoader, PyTorch makes it easy to manage data efficiently and flexibly. In future posts, we’ll explore how these tools integrate into full training loops.
PyTorch also offers ways to speed up sampling through multiprocessing and memory-pinning, which are both reasonably complicated and have some warnings attached to them, the latter being the reason that I did not include them in this post. If you are interested, or already know all about multiprocessing and GPU computations you can read about the topics here. Thanks for reading all the way to the end, I hope to see you on day 3!